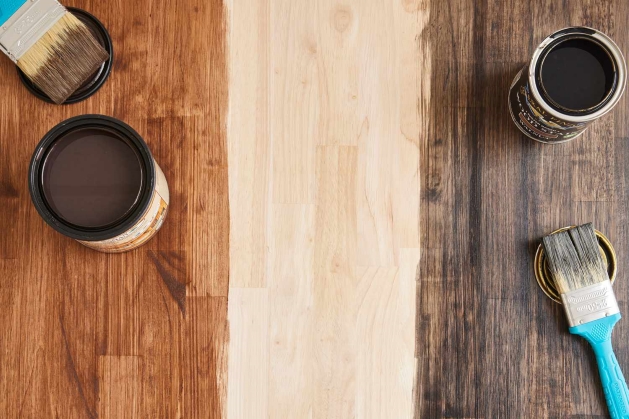
Staining wood is a transformative process that infuses your space with warmth and luxury. Whether you’re working on furniture, floors, or decorative accents, this can transform an ordinary piece into something extraordinary. The deep hues that emerge from staining enhance the material’s grain and character. This creates a striking focal point that improves the overall atmosphere of your room.
But to make the most of its beauty, it’s essential to know how to choose and use the right product. I’ll share my tips on staining wood, so you can achieve the perfect finish that brings out the natural elegance of your pieces. To protect and enhance the beauty of your wooden floors or outdoor items, it’s important to use weather-resistant, high-quality wood stains as they protect against moisture, sun rays, and other environmental stressors.
Certain products are specifically formulated to provide long-lasting protection against rain and snow. Others offer an eco-friendly option that protects without sacrificing the natural look of the wood. If you’re after something that offers a deeper, more vibrant colour while still protecting the material, certain finishes are made with pure tung oil, which has a rich, glossy appearance.
Oil-Based vs Water-Based

If you’re new to DIY, a wood stain might seem similar to paint, but this type of products is designed to preserve the integrity of the material while enhancing its rich tones. Stains come in two main types: oil-based and water-based. Both offer unique benefits, from providing deep penetration and moisture resistance to being more environmentally friendly and easier to clean, depending on your choice.
When choosing between oil-based and water-based, it’s important to consider how each type will affect your project, especially in terms of durability and drying time. Oil-based wood stains are the go-to choice for exterior wood projects. The oil’s small molecules deeply penetrate the material, offering long-lasting protection from the elements and creating a moisture-resistant base layer.
The downside is that these substances take a bit longer to dry. On warm, sunny days, you can expect them to dry in about 6 to 8 hours, but in cooler weather it might take up to a day. Despite the extended drying time, they tend to provide more even coverage, and their durability means you’ll need less maintenance over time. On the flip side, water-based wood stains in Canada have larger molecules that sit closer to the surface.
While they dry much faster than oil-based options, often within a few hours, they don’t penetrate as deeply, which can affect their long-term durability. However, these products have a few perks, like a less overpowering odour and a faster application process. They’re great for smaller projects or when you need to get the job done quickly. Plus, they enhance the wood’s colour and prevent trapped moisture from causing decay. This makes them a good choice for surfaces that have already been treated with an oil-based product.
Tools Required
Before diving into the staining process, it’s essential to gather the right tools and materials to ensure everything goes smoothly. Having these items ready will make your project easier and help you achieve a professional-looking finish:
- Wood stains: A high-quality stain is a must for a great finish. Look for one that offers durability and minimal maintenance while giving the surface a rich, natural colour that won’t crack or peel;
- Paintbrushes: Choose high-quality brushes for a smooth application. If you plan to buy a water-based wood stain online, go for synthetic bristle or foam brushes, and for oil-based options, use natural bristle brushes for better results;
- Clean Rags: Use clean, white cloths to wipe away excess product. Avoid using coloured rags that could transfer their dyes onto your wood;
- Sandpaper: Sanding is key to ensuring a smooth, even surface. Use these different grits to prep your wood before staining;
- Conditioner: A conditioner helps the surface absorb the product evenly. This way you’ll end up with a more consistent finish;
- Sealant: Choose a sealant that matches your stain type (oil-based or water-based) to lock in your work and protect it from moisture;
- Finish: A finish helps seal your wood, ensuring it stays protected and maintains its beautiful appearance over time.
What’s the Proper Way to Stain Wood?

If you’re a complete beginner, here’s a quick guide to get you started and some best practices to follow:
- Conditioning and prep: Start by sanding the wood to create a smooth surface. Sand with the grain, beginning with medium grit (120) and working your way up to finer grit (220). For oil-based products, use 180 grit for a smooth finish. Sanding helps open up the wood’s pores, allowing the products to absorb better;
- Apply a conditioner: Before staining, apply a pre-stain conditioner to ensure an even finish. Brush it in the direction of the grain, starting with a light layer and building up to a more generous coat. Let it set for 5 to 15 minutes, then wipe off any excess with a clean cloth;
- Stain the wood: Once the conditioner has dried, it’s time to apply your stain. Shake or stir the can thoroughly to ensure the liquid is evenly mixed. Start with thin, even layers, working with the grain. Too much product at once can lead to darker, uneven spots. Wipe away any excess with a clean cloth;
- Wait for it to dry: Allow the product to fully dry before moving to the next step. Water-based options typically dry faster than oil-based ones, so be sure to check the drying time for the specific product you’re using;
- Seal the wood (if needed): While not always necessary, sealing the material can help protect it from wear and environmental factors. Apply a polyurethane finish for areas exposed to the elements or heavy foot traffic. A couple of coats will help preserve the colour and protect the wood.


